HOFF PARQUET - HIGH-END CUSTOM MADE WOOD FLOORING
  • Home
  • Products
    • Wood Flooring Collections >
      • Engineered Wood Flooring
      • Solid Wood Flooring
      • Wide Plank Wood Flooring
      • Live Edge Wood Flooring
      • Ash Wood Flooring
      • Douglas Fir Wood Flooring
      • Walnut Wood Flooring
      • Larch Wood Flooring
      • Reclaimed Oak Wood Flooring
    • Parquet Flooring Collections >
      • Chevron Parquet
      • Herringbone Parquet
      • Mansion Weave Parquet
      • Versailles Parquet
      • Design Parquet Panels
    • Wood Cladding
    • Charred Wood
    • Wood For Stairs
    • Unfinished Wood Flooring >
      • Unfinished Oak Wood Floors
      • Unfinished Ash Wood Floors
    • Acoustic Wall Panels
    • Architectural Details
    • Thermo Wood Wall Cladding and Decking
  • Bespoke Wood Flooring
  • Services
    • For Professionals
    • Wood Flooring Installation
    • Floor Sanding & Repair
  • Information
    • Terms & Conditions
    • Privacy Policy
    • Wood Flooring Grades
    • Wood Flooring Patterns
    • Surface Processings
    • Wood Flooring Installation Methods
    • Engineered Flooring Technical Specification
  • BLOG
  • Gallery
  • Contact
  • Trade Program
  • FAQs

Herringbone Parquet Flooring Installation Guidance

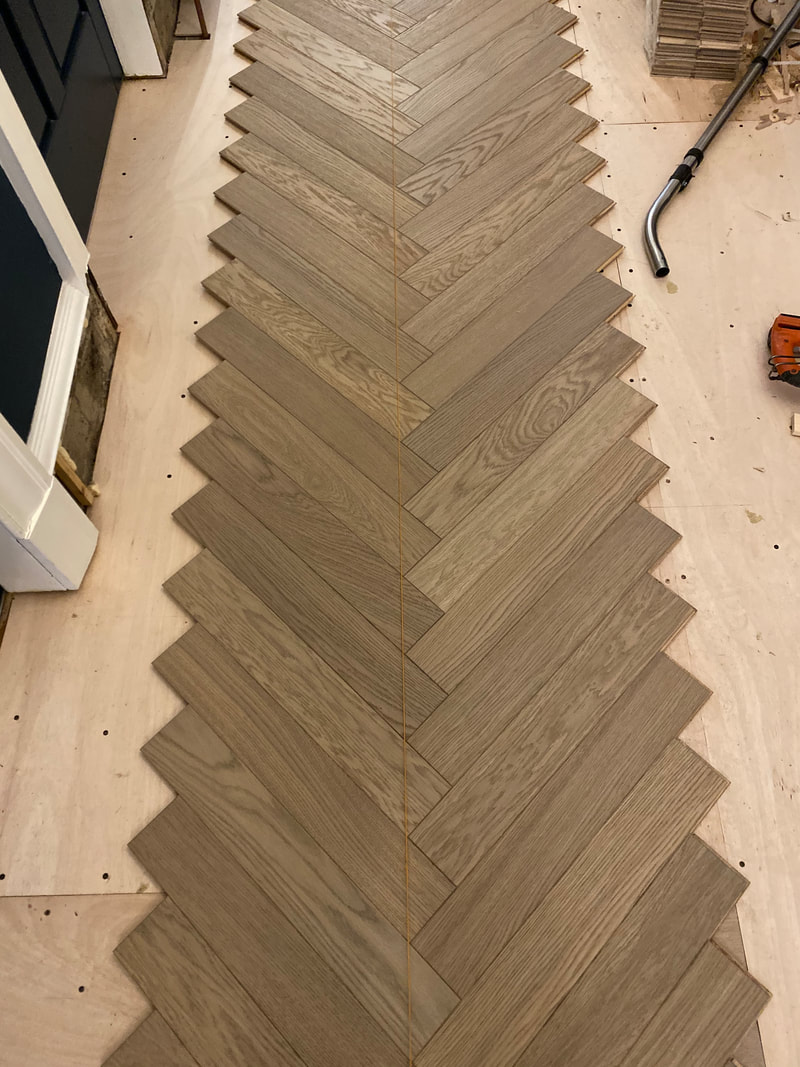
We must warn you that installing chevron parquet flooring requires significant skill, experience, and attention to detail. If not done correctly, it can lead to unsightly gaps, uneven edges, or even damage to the flooring.
​

That being said, here are the step-by-step instructions for installing herringbone parquet flooring using secret nails:

  1. Prepare the Subfloor: Ensure the subfloor is clean, level, and dry. Any unevenness or bumps should be smoothed out, and any loose or damaged boards should be replaced.
  2. Acclimate the Flooring: Allow the herringbone parquet flooring to acclimate to the room's temperature and humidity for at least 72 hours before installation.
  3. Establish the Center Line: Find the center of the room and snap a chalk line from end to end. This line will serve as a reference point for the installation.
  4. Spread the Adhesive: Using a notched trowel, spread adhesive on a small section of the subfloor along the center line. Only apply adhesive that can be covered by the flooring within 30 minutes.
  5. Lay the First Row: Starting from the center line, lay the first row of herringbone parquet flooring, with the tongue facing outwards. Press down firmly to ensure a good bond with the adhesive.
  6. Cut the Angled Pieces: Cut the angled pieces that will fit in between the first row, using a chop saw or a miter saw. Be sure to measure and cut each piece precisely, ensuring a snug fit.
  7. Install the Angled Pieces: Install the angled pieces, making sure they fit snugly against the first row. Use a tapping block and a hammer to tap the pieces into place.
  8. Repeat the Process: Continue laying the herringbone parquet flooring in rows, alternating the angled pieces with the straight pieces. Use spacers to maintain consistent gaps between each board.
  9. Cut the Last Row: Once you reach the opposite end of the room, you may need to cut the final row of boards to fit. Be sure to leave a gap between the last row and the wall to allow for expansion.
  10. Allow the Adhesive to Dry: Allow the adhesive to dry for the manufacturer's recommended time before walking on the floor or installing the baseboards.
  11. Install the Skirting Boards: Once the finish has dried, install the baseboards to cover the gaps between the flooring and the walls.


Glue down herringbone parquet flooring installation guidance:

  1. ​Prepare the Subfloor: Ensure the subfloor is clean, level, and dry. Any unevenness or bumps should be smoothed out, and any loose or damaged boards should be replaced.
  2. Acclimate the Flooring: Allow the herringbone parquet flooring to acclimate to the room's temperature and humidity for at least 72 hours before installation.
  3. Establish the Center Line: Find the center of the room and snap a chalk line from end to end. This line will serve as a reference point for the installation.
  4. Spread the Adhesive: Using a notched trowel, spread adhesive on a small section of the subfloor along the center line. Only apply adhesive that can be covered by the flooring within 30 minutes.
  5. Lay the First Row: Starting from the center line, lay the first row of herringbone parquet flooring, with the tongue facing outwards. Press down firmly to ensure a good bond with the adhesive.
  6. Cut the Angled Pieces: Cut the angled pieces that will fit in between the first row, using a chop saw or a miter saw. Be sure to measure and cut each piece precisely, ensuring a snug fit.
  7. Install the Angled Pieces: Install the angled pieces, making sure they fit snugly against the first row. Use a tapping block and a hammer to tap the pieces into place.
  8. Repeat the Process: Continue laying the herringbone parquet flooring in rows, alternating the angled pieces with the straight pieces. Use spacers to maintain consistent gaps between each board.
  9. Cut the Last Row: Once you reach the opposite end of the room, you may need to cut the final row of boards to fit. Be sure to leave a gap between the last row and the wall to allow for expansion.
  10. Allow the Adhesive to Dry: Allow the adhesive to dry for the manufacturer's recommended time before walking on the floor or installing the skirting boards.
  11. Install the Skirting Boards: Once the finish has dried, install the baseboards to cover the gaps between the flooring and the walls.


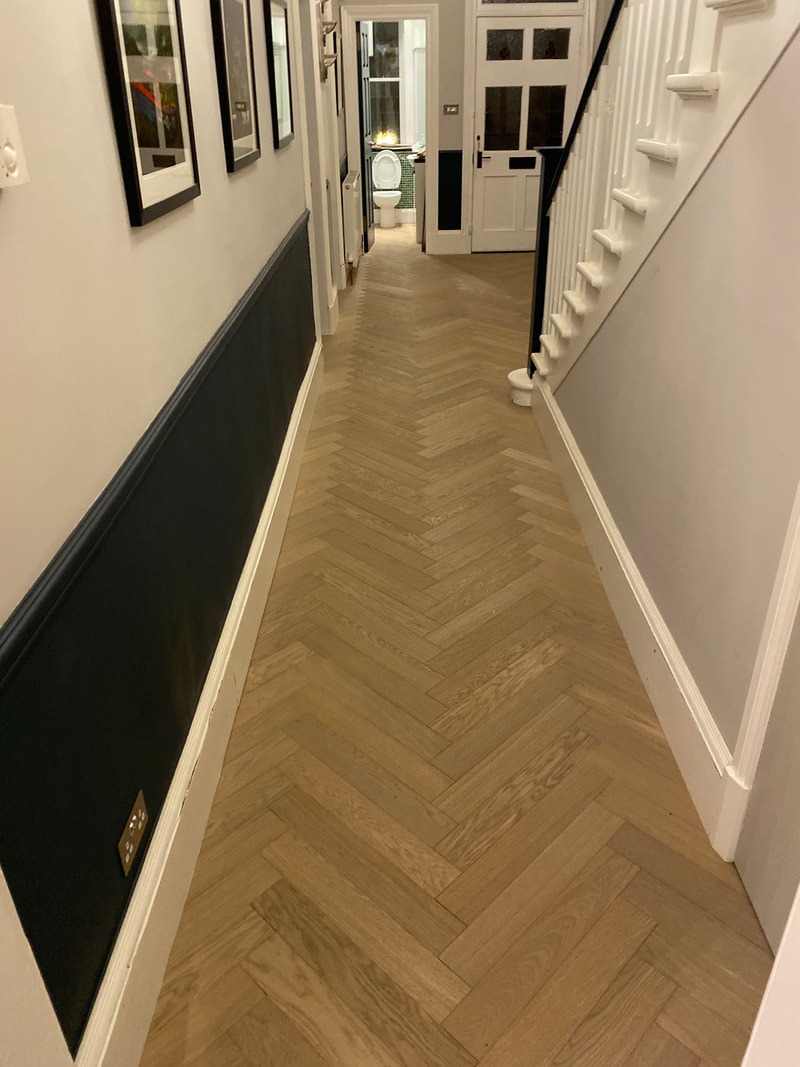
You may have to Sand and Finish the herringbone parquet flooring (if installing unfinished herringbone parquet floors): Once the adhesive is dry, sand the floor to remove any imperfections or rough edges. Then, apply the finish of your choice to protect the wood and enhance its natural beauty.


Installing herringbone parquet flooring requires a significant amount of skill and experience to ensure a flawless finish. It is always best to consult a professional flooring installer or refer to the manufacturer's installation instructions to ensure you have the correct tools, adhesive, and equipment for the job.
Oak parquet flooring installation
herringbone parquet floors installation

About Hoff Parquet

HOFF PARQUET - wood flooring company based in Edinburgh. We are your go-to company for the best real wooden floors like Chevron Parquet and Herringbone Parquet, Engineered Wood Floors & Solid Wood Flooring for any residential or commercial project. Our dream is to create unique luxury hardwood elements including wooden floors, wood for wall cladding, wood for stairs and bespoke parquetry. 
At Hoff Parquet think GREEN. We were inspired to create a greener and more environmentally friendly company and product inventory. Only the highest quality eco friendly materials used for our wood flooring products, cladding and decking during the production and installation process. 
Our custom-made flooring design and made by experienced craftsmen offers premium quality, trendy shapes and colours. In collaboration with interior designers and architects we create the flooring which becomes a truly unique interior detail.

We hereby confirm that all our wood flooring products are made in the European Union. Furthermore, all our wood materials are backed with FSC (Forest Stewardship Council) and PEFC (Programme for the Endorsement of Forest Certification Schemes) manufacturers' certificates, ensuring that our products meet the highest standards of sustainability and environmental responsibility.
​
We are always open for innovations, new contacts and we are constantly in search for new partners!

Browse By Design

Light Colour Wood Flooring
Dark Colour Wood Flooring
Grey Colour Wood Flooring
​Band Sawn Oak Wood Flooring
Solid Wood Flooring
Engineered Wood Flooring
Bespoke Wood Flooring
Wide Plank Wood Flooring
Herringbone Parquet Flooring
Versailles Parquet Panels
​Chevron Parquet Flooring
Reclaimed Oak Wood Flooring
​Wood For Wall Cladding
Tumbled Parquet & Wood Flooring
​
Thermo Wood Decking & Wall Cladding
​Composite Wood Decking, Fencing, Cladding

Our Services

Wood Floor & Parquet Fitting
Bespoke Stair Cladding
Wall Cladding
Flooring Contractors
Decking Installation
HOFF PARQUET
37 Comiston Road, Morningside
​Edinburgh
EH10 6AB
[email protected] / 01313857779
Privacy Policy
Terms & Conditions
We plant trees with Ecologi
© COPYRIGHT 2025 ALL RIGHTS RESERVED.
  • Home
  • Products
    • Wood Flooring Collections >
      • Engineered Wood Flooring
      • Solid Wood Flooring
      • Wide Plank Wood Flooring
      • Live Edge Wood Flooring
      • Ash Wood Flooring
      • Douglas Fir Wood Flooring
      • Walnut Wood Flooring
      • Larch Wood Flooring
      • Reclaimed Oak Wood Flooring
    • Parquet Flooring Collections >
      • Chevron Parquet
      • Herringbone Parquet
      • Mansion Weave Parquet
      • Versailles Parquet
      • Design Parquet Panels
    • Wood Cladding
    • Charred Wood
    • Wood For Stairs
    • Unfinished Wood Flooring >
      • Unfinished Oak Wood Floors
      • Unfinished Ash Wood Floors
    • Acoustic Wall Panels
    • Architectural Details
    • Thermo Wood Wall Cladding and Decking
  • Bespoke Wood Flooring
  • Services
    • For Professionals
    • Wood Flooring Installation
    • Floor Sanding & Repair
  • Information
    • Terms & Conditions
    • Privacy Policy
    • Wood Flooring Grades
    • Wood Flooring Patterns
    • Surface Processings
    • Wood Flooring Installation Methods
    • Engineered Flooring Technical Specification
  • BLOG
  • Gallery
  • Contact
  • Trade Program
  • FAQs